Episode Eleven: Final Mix and Master
The song is now in its final draft stage. The full arrangement is built — drums, bass, guitar, synths, and vocals all locked in (see previous journals for the breakdown). Now it’s time to shape the mix and prep for mastering.
BALANCE
Balance is everything. As I build out my songs, I mix and level instruments and vocals as I go — never leaving it until the end. The golden rule: leave headroom. Nothing ruins a mix faster than clipping the master fader.
I aim for at least 6–8 dB of margin between zero (clipping) and the loudest peaks (drum hits, vocal bursts). On average, I keep mixes around -18 dB. This isn’t about nitpicking; it’s simply where I land before mastering. Remember — mastering is where volume is adjusted. Mixing is all about balance between parts, not overall loudness.
THE TOOLS
I add EQ, compression, and effects along the way — not just at the end. Here is a Vocal track example for this particular song:
EQ (to carve out space)
Compression (for control and punch)
Delay/Reverb (subtle, tailored to each song)
Here’s an example of my vocal chain for this track:
UAD RealVerb Pro: ~3% wetness, just a touch of space.
Slate Trimmer: volume leveling + slight saturation.
EQ8: sculpting the voice — removing mud, brightening highs.
1176SE Compressor: aggressive compression for energy.
RAUM Reverb: low-level depth in the chorus.
Delay Bus: moderate delay with short feedback.
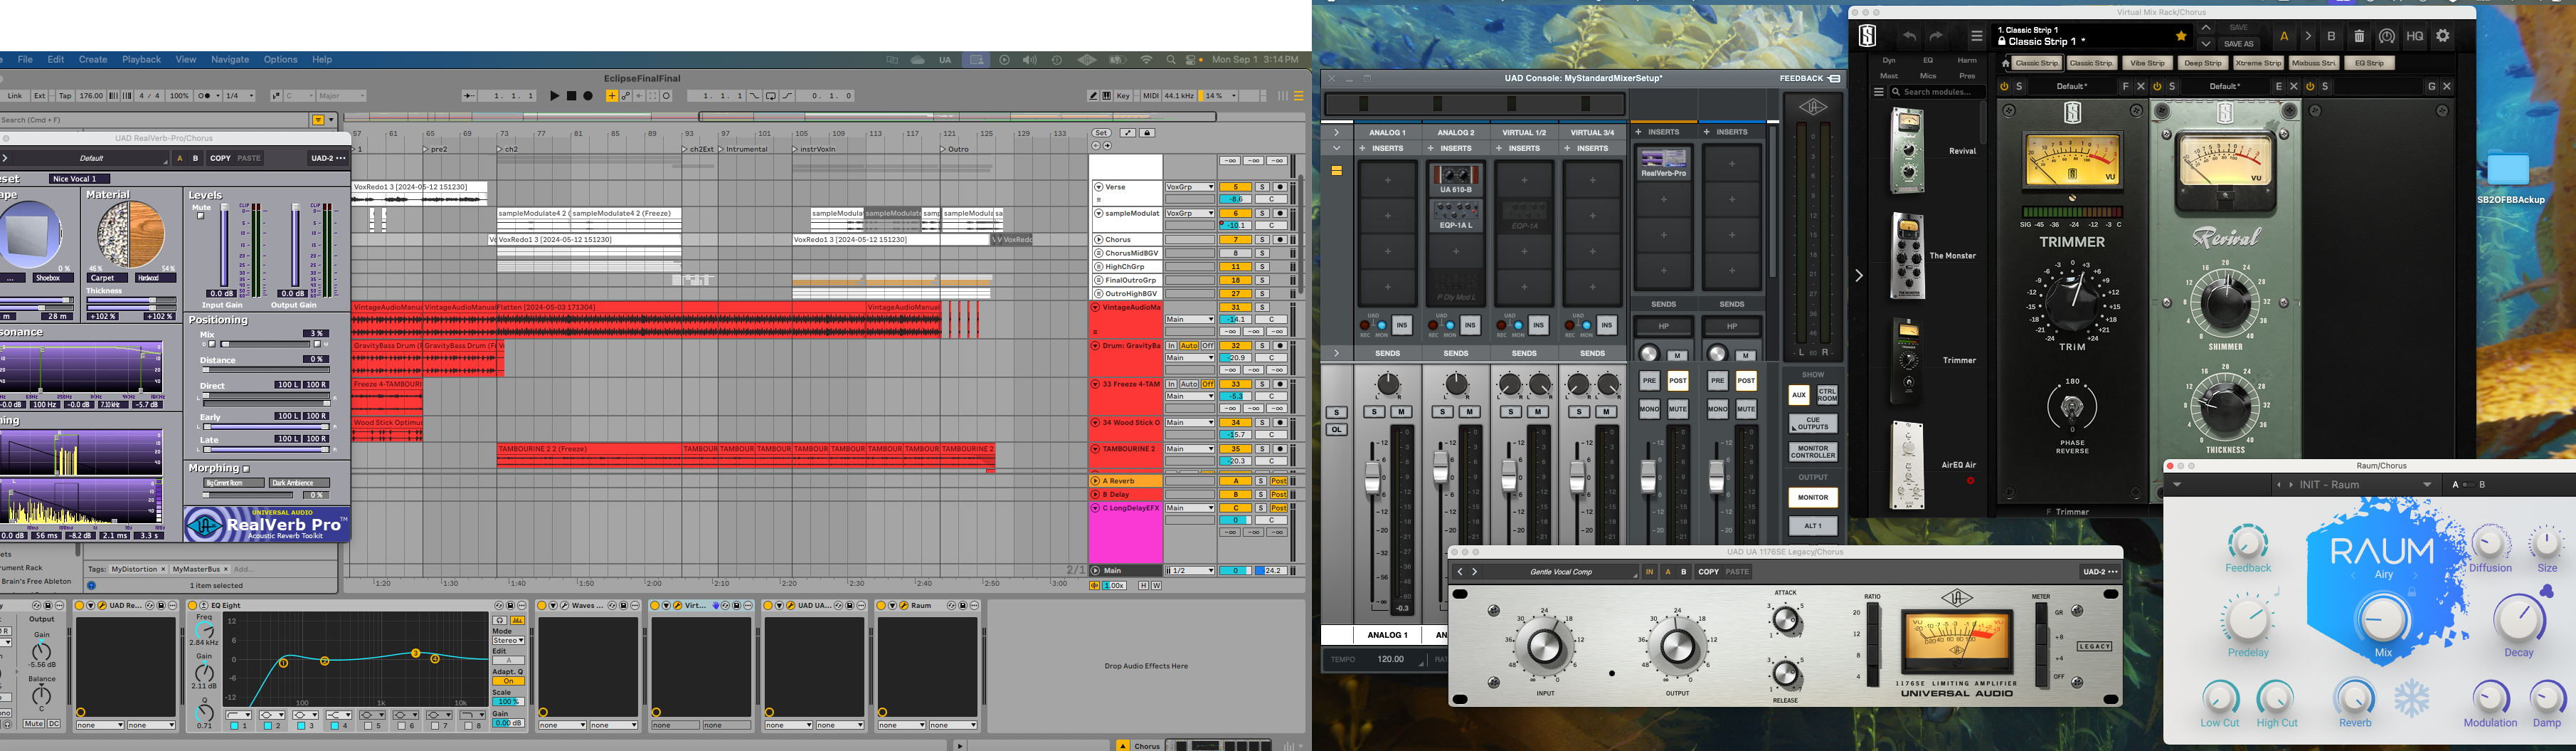
For background vocals, I use a similar chain, usually routed through a bus for easier control.
FINAL THOUGHT
Not every instrument needs heavy EQ or compression. Many synths and virtual guitars already come polished with processing baked into their presets. The key is restraint: don’t crush what already works. Let the sound speak, and add only what serves the song.
TIDY UP YOUR DAW HOUSE
Before diving into final tweaks, organize your session:
Color-code your tracks.
Group like instruments together.
Keep your mix space clean.
This isn’t just about neatness. A tidy DAW means your workflow is faster, your decisions sharper, and your mix moves based on logic — not luck.
LISTEN AND FIX
Once the balance feels right, I compare my mix against a reference track (with the reference volume lowered to match my quieter mix). Then: I listen. I listen. I listen.
Start with problems:
Any stray noises? (mic bumps, mouth clicks, chair creaks, breaths, clicks from recording starts/stops). Clean it up. This is post-editing.
Balance check: Are the vocals sitting clearly above the music? Do the drums hit with that satisfying thwack? Is the bass stepping on the kick?
Lost instruments? If you can’t hear them, ask: Do they add value, or are they just noise? Sometimes the mix buries parts because they don’t serve the song — and that’s okay.
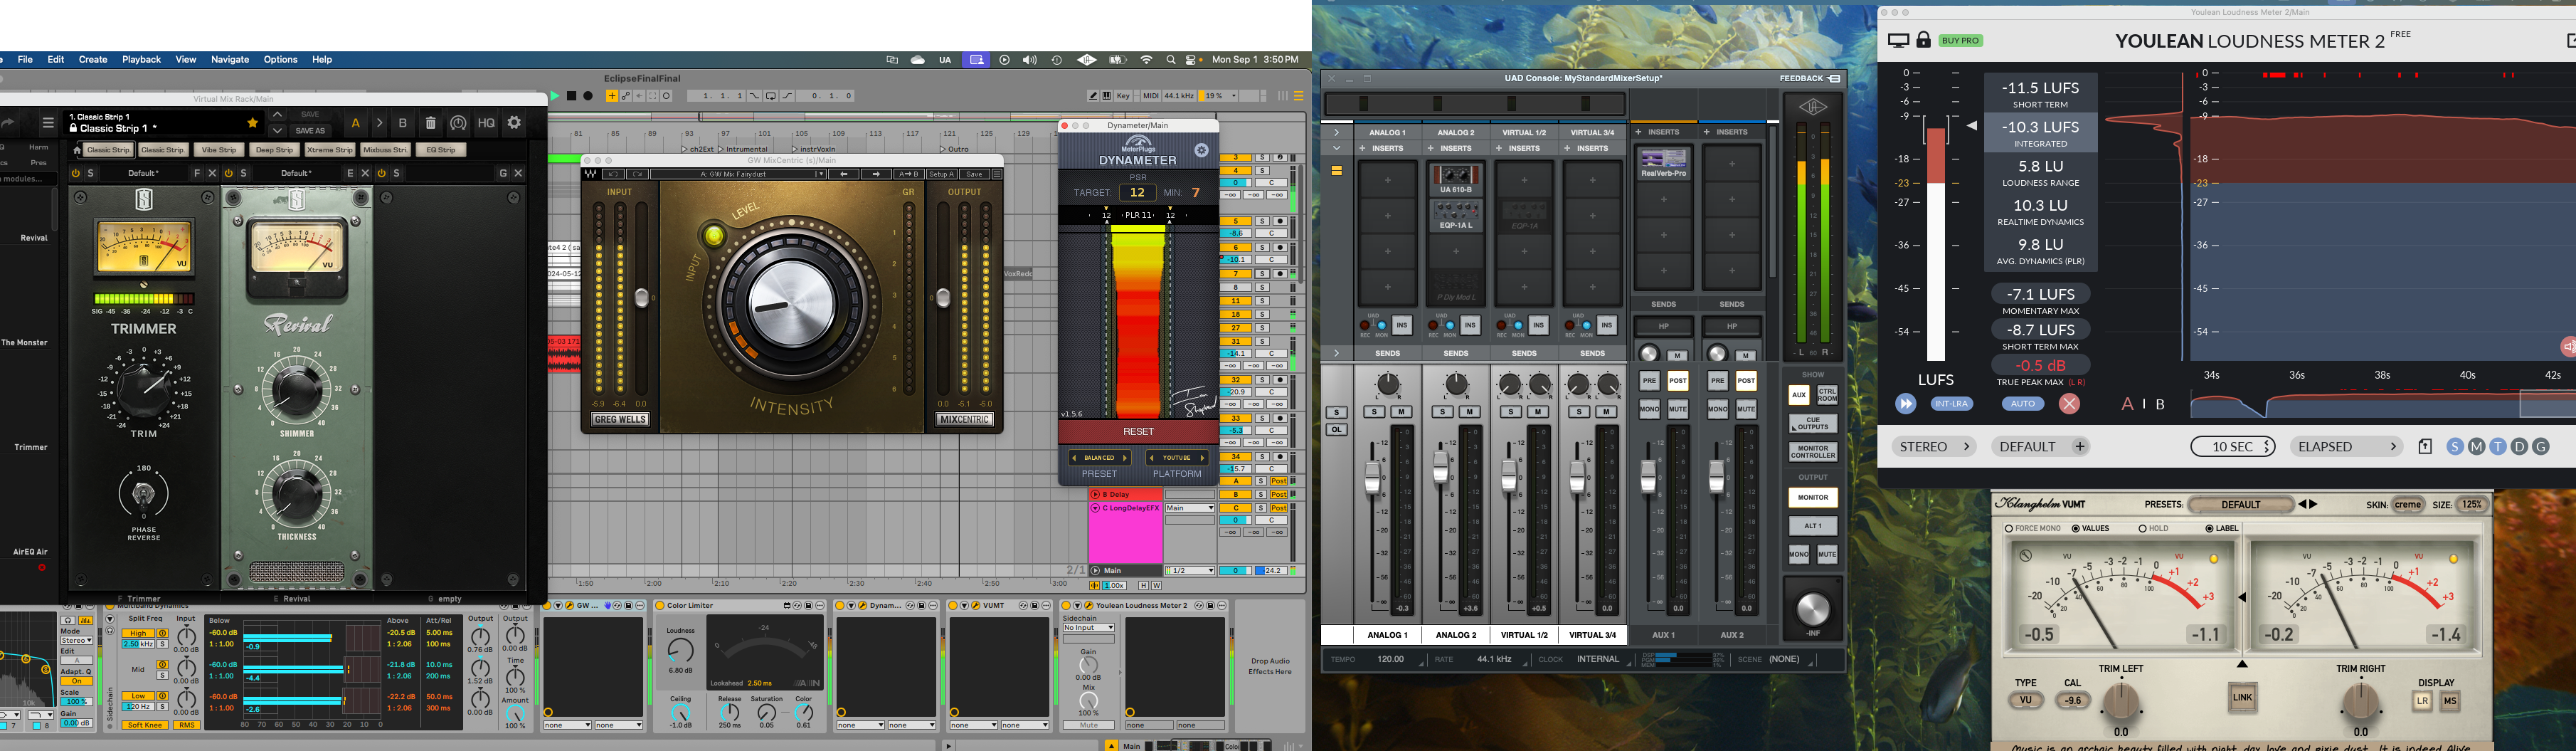
MASTERING
I master my own tracks. Many argue you should hire an expert — and they’re right — but I don’t always have the time or budget.
At its simplest, mastering is:
Turning up the overall volume
Applying light limiting to catch the peaks (1–2 dB of gain reduction at most).
If the mix is strong, this is usually enough.
Here’s how I rule of thumb approach it:
Integrated loudness: around -11 LUFS
Short-term loudness: around -9.5 LUFS
Limiter ceiling: -1 dB (lets stray transients “kiss” the limiter without flatlining dynamics)
Dynamic range: preserved — don’t squash the life out of your track. Nobody wants “loud but lifeless.”
I’ll sometimes add a touch of EQ, multiband compression, or light saturation — but always sparingly. Overdo it here and you can destroy your mix.
Below is the actual mastering chain I used on this song.
I will share the song with you next episode. Thanks for taking this journey with me.
Song release is 12 SEP 25!
Article Top
Next Episode
Previous Episode
#Music Series